What Happens When You Type google.com Into Your Browser?
A browser can load Google in a fraction of a second, but a surprising amount of work happens behind the scenes. Let's follow the complete journey from a typed URL to pixels on your screen.
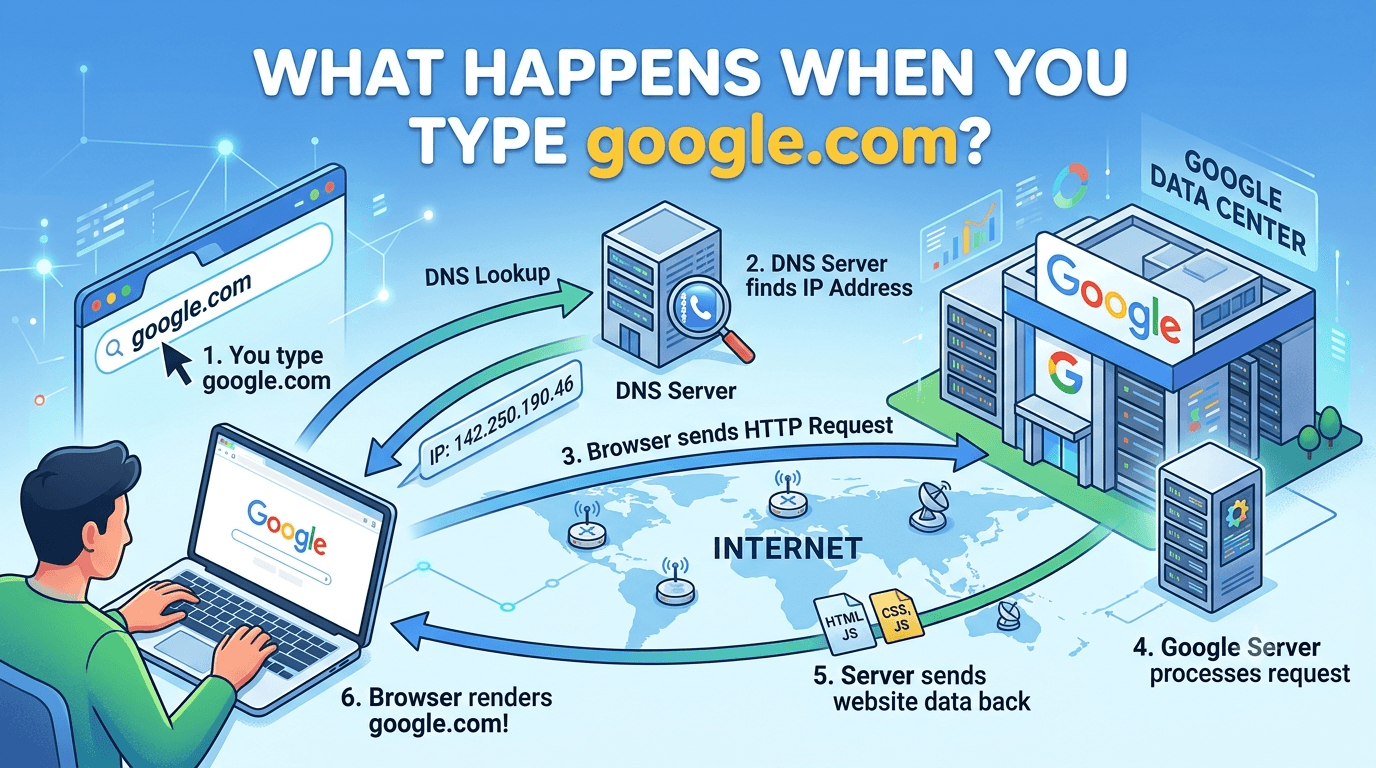
You open your browser, type google.com, and press Enter.
A fraction of a second later, the Google homepage appears. It feels like one simple action, but your browser, operating system, router, DNS servers, and Google's infrastructure have already exchanged multiple messages and made dozens of decisions.
So what actually happened?
Let us follow the journey from the moment you press Enter to the moment the page becomes visible.
This article describes a typical first visit. On repeat visits, caching and existing connections may allow the browser to skip several steps.
The complete journey at a glance
Before exploring each part, here is the simplified flow:
You type google.com
        ↓
Browser understands the URL
        ↓
Browser checks caches and security rules
        ↓
DNS finds Google's IP address
        ↓
A connection is established
        ↓
TLS creates a secure channel
        ↓
Browser sends an HTTP request
        ↓
Google sends an HTTP response
        ↓
Browser parses HTML, CSS, and JavaScript
        ↓
Browser calculates layout and paints pixels
        ↓
The page becomes visible and interactive
That small address bar hides an entire distributed system.
Step 1: The browser interprets what you typed
The browser first decides whether google.com is:
- a URL that should be opened, or
- a search phrase that should be sent to your default search engine
Because google.com looks like a valid domain name, the browser treats it as a website address.
You did not type the complete URL, so the browser fills in the missing parts. Conceptually, it becomes:
https://google.com/A URL can contain several components:
https://www.google.com/search?q=browser#results
  │          │          │       │       │
scheme host path query fragment- Scheme:
httpstells the browser which protocol to use - Host:
www.google.comidentifies the destination - Path:
/searchidentifies a resource on that destination - Query:
q=browsersends additional parameters - Fragment:
resultspoints to a location inside the returned page
The browser normalizes the address, checks whether it is valid, and prepares to navigate.
Step 2: Security policies and caches are checked
Before contacting the internet, the browser checks what it already knows.
It may inspect:
- its HTTP cache for a reusable response
- its DNS cache for a recently resolved IP address
- the operating system's DNS cache
- a service worker that can intercept the request
- an existing open connection to the same server
- HSTS rules that require the domain to use HTTPS
HSTS, or HTTP Strict Transport Security, tells a browser that a domain must only be opened through HTTPS. This protects users from accidentally connecting through insecure HTTP.
If a valid cached response exists, the page may load with little or no network activity. For this walkthrough, assume it is a fresh visit and the browser has no useful cached data.
Step 3: DNS translates the domain into an IP address
Computers route network traffic using IP addresses, not names like google.com.
The browser therefore needs to translate:
google.com → an IP addressThis translation is performed by the Domain Name System, or DNS. You can think of DNS as the internet's distributed phonebook.
Where does the browser look first?
DNS resolution does not always begin with a request to a distant server. The browser and operating system check several places first:
- Browser DNS cache
- Operating system DNS cache
- Local
hostsfile - Configured DNS resolver, often provided by the router, ISP, company, or a public DNS service
If none of these already contains a valid answer, the DNS resolver starts finding one.
How recursive DNS resolution works
The resolver may contact multiple DNS servers:
Browser
   ↓
Recursive resolver
   ↓
Root DNS server
   ↓
.com TLD server
   ↓
Authoritative server for google.com
   ↓
IP address returned to the browser
Each server answers a different question:
- The root server points toward the servers responsible for
.com - The TLD server points toward the authoritative servers for
google.com - The authoritative server provides the requested DNS record
The final answer may include an IPv4 address in an A record, an IPv6 address in an AAAA record, or another DNS record that leads to the destination.
The resolver caches the answer for its specified TTL, or time to live, so future lookups can be faster.
Why the IP may not be the same for everyone
Large services do not usually have one server with one permanent IP address. DNS may return different addresses based on:
- the user's location
- server availability
- network conditions
- load distribution
- IPv4 or IPv6 support
This helps route a user to suitable infrastructure instead of sending the entire world to one machine.
Step 4: Your device sends packets toward the destination
Now the browser knows the destination IP address, but the data still needs to leave your device.
Your operating system determines whether the destination is on the local network. Since Google's server is not inside your home or office network, the packets are sent to the default gateway, usually your router.
On an Ethernet or Wi-Fi network, your device needs the gateway's local hardware address. It may use:
- ARP for IPv4
- Neighbor Discovery for IPv6
The router then forwards the packets toward your ISP. From there, they travel through multiple routers across the internet. Each router examines the destination IP and chooses the next hop.
You can imagine the journey like this:
Your device
    ↓
Home or office router
    ↓
Internet service provider
    ↓
Several intermediate networks
    ↓
Google's network
The packets do not need to follow the exact same physical route every time. Internet routing protocols continuously adapt to network availability and routing policies.
What NAT may do
In many home and office networks, your device has a private IP address such as 192.168.x.x or 10.x.x.x. These addresses are not directly routable across the public internet.
Your router commonly performs Network Address Translation, or NAT. It replaces the private source address with the router's public IP address and keeps track of which response belongs to which internal device.
To Google, the request normally appears to come from the public-facing network address, not directly from your device's private address.
Step 5: A network connection is established
The browser must now establish a reliable way to communicate with the server.
The exact process depends on the HTTP version selected.
Path A: TCP for HTTP/1.1 or HTTP/2
When TCP is used, the client and server perform a three-way handshake:
Client  →  SYN      →  Server
Client  ←  SYN-ACK  ←  Server
Client  →  ACK      →  Server
This exchange confirms that both sides are reachable and ready to communicate.
TCP provides:
- reliable delivery
- correct packet ordering
- retransmission of lost data
- flow control
- congestion control
The browser commonly connects to port 443, the standard port for HTTPS.
Path B: QUIC for HTTP/3
Modern browsers and servers may use HTTP/3, which runs over QUIC instead of TCP.
QUIC uses UDP as its foundation but adds reliability, encryption, congestion control, and multiple independent streams. It can reduce connection setup overhead and avoids some delays caused when one lost packet blocks unrelated streams.
The practical point is:
- HTTP/1.1 and HTTP/2 usually use TCP
- HTTP/3 uses QUIC over UDP
The browser and server negotiate a protocol they both support. There is no guarantee that every visit uses the same one.
Step 6: TLS creates a secure connection
Because the URL uses HTTPS, the browser must verify the server and encrypt the communication. This is handled by TLS, or Transport Layer Security.
During the TLS handshake, the browser and server broadly do the following:
- Agree on supported TLS parameters and cryptographic algorithms
- The server sends its digital certificate
- The browser validates the certificate
- Both sides establish shared session keys
- Encrypted communication begins
What the browser checks in the certificate
The browser checks that:
- the certificate includes the requested domain
- it has not expired
- it is signed through a trusted certificate chain
- it has not been rejected for a known security problem
The trusted root certificates are stored in the browser or operating system.
If verification succeeds, the address bar shows a secure connection. If it fails, the browser displays a certificate warning instead of silently trusting the server.
What HTTPS protects
TLS provides three important properties:
- Encryption: outsiders should not be able to read the exchanged data
- Integrity: data should not be modified unnoticed while travelling
- Authentication: the browser can verify that it reached a server authorized for the domain
TLS does not hide every piece of connection metadata, but it protects the HTTP request and response contents from ordinary interception.
Step 7: The browser sends an HTTP request
Once the secure connection is ready, the browser can request the page.
A simplified HTTP request might look like this:
GET / HTTP/2
Host: google.com
User-Agent: Mozilla/5.0 ...
Accept: text/html,application/xhtml+xml
Accept-Language: en-US,en;q=0.9
Accept-Encoding: gzip, br
Cookie: ...
The request contains:
- Method:
GETasks for a resource - Path:
/requests the homepage - Host: identifies the target domain
- Headers: describe the browser and accepted response formats
- Cookies: may carry session or preference data for that domain
Since the connection uses HTTPS, these HTTP details are encrypted while travelling over the network.
Step 8: Google's infrastructure processes the request
The request reaches Google's network, but it may not go directly to one application server.
A large web service commonly has several layers:
Incoming request
       ↓
Edge server or front end
       ↓
Load balancing and routing
       ↓
Application services
       ↓
Cache, storage, or other internal services
These layers can:
- terminate the secure connection
- filter malicious traffic
- route the request to a healthy service
- serve cached content
- apply language, location, or account preferences
- generate the requested HTML
The precise internal architecture is private and constantly evolving. The important idea is that a domain name represents a distributed service, not necessarily one physical server.
If you typed only google.com, the server may also respond with a redirect to a preferred hostname or localized address. The browser follows the redirect by making another request.
Step 9: The server sends an HTTP response
The server returns an HTTP response containing a status code, headers, and a body.
A simplified response could look like this:
HTTP/2 200 OK
Content-Type: text/html; charset=UTF-8
Content-Encoding: br
Cache-Control: private, max-age=0
Set-Cookie: ...

<!doctype html>
<html>
  ...
</html>
Important parts include:
- Status code:
200means the request succeeded - Content-Type: tells the browser how to interpret the body
- Content-Encoding: indicates whether the response is compressed
- Cache-Control: defines how the response may be cached
- Set-Cookie: asks the browser to store cookie data
- Body: contains the HTML document
The HTML may arrive in multiple packets. The browser does not always wait for the entire document before starting to process it.
Step 10: The browser builds the DOM
As HTML arrives, the browser parses it and converts it into a tree of objects called the Document Object Model, or DOM.
For example:
<body>
  <main>
    <h1>Google</h1>
    <input type="search" />
  </main>
</body>
Becomes a structure similar to:
Document
└── body
    └── main
        ├── h1
        │   └── "Google"
        └── input
The DOM is not a screenshot of the page. It is an in-memory representation that JavaScript can read and modify.
While parsing HTML, the browser discovers additional resources such as:
- CSS stylesheets
- JavaScript files
- images
- fonts
- icons
It then schedules more network requests for those resources. Some may come from the same domain, while others may come from different hosts and require their own DNS lookups and connections.
Step 11: The browser builds the CSSOM
CSS controls how elements should look.
The browser parses CSS and creates the CSS Object Model, or CSSOM. It contains the style rules that apply to the document.
For example:
h1 {
  color: blue;
  font-size: 32px;
}
The browser must determine which rules apply to each visible DOM element. CSS is often render-blocking because the browser should avoid painting a page before it knows how that page is supposed to look.
Step 12: JavaScript is downloaded and executed
JavaScript adds behavior and can change both content and styles.
It may:
- handle the search box
- respond to clicks and keyboard input
- update the DOM
- make additional API requests
- read or write browser storage
- register event listeners
A normal script can pause HTML parsing while it downloads and runs. Developers can use attributes such as defer or async to change that behavior and reduce blocking.
JavaScript runs inside the browser's security environment. Code from one origin is generally restricted from freely reading data belonging to another origin. This is part of the browser's same-origin policy.
Step 13: The render tree is created
The browser combines information from the DOM and CSSOM to create a render tree.
The render tree contains the elements that need to be visually displayed, along with their calculated styles.
Not every DOM node appears in it:
<head>is not visually rendered<script>does not appear as page content- elements with
display: noneare excluded
At this point, the browser knows what should be visible, but it still needs to calculate where everything goes.
Step 14: Layout calculates size and position
During layout, sometimes called reflow, the browser calculates the exact geometry of each visible element:
- width and height
- position
- spacing
- line wrapping
- relationship to parent and child elements
Relative values such as percentages, viewport units, and flexible layouts are converted into actual positions and sizes for the current screen.
If JavaScript later changes the page or a font changes text dimensions, the browser may need to perform layout again.
Step 15: Paint turns elements into pixels
Once layout is known, the browser performs paint.
Painting creates visual instructions for:
- text
- colors
- borders
- shadows
- backgrounds
- images
Complex pages may be divided into multiple layers. The browser can rasterize these layers and send them to the GPU.
Step 16: Compositing displays the final page
In the compositing stage, the browser combines the painted layers in the correct order.
This is the final step that turns the page structure into pixels on your screen.
The first visible version may appear before every image, font, or script has finished loading. Browsers render progressively, so the page can continue changing after the first paint.
Once event handlers are ready and the main thread is available, the page becomes interactive. You can click the search box, type a query, and start another sequence of network requests.
What changes on the second visit?
The second visit may be much faster because the browser can reuse previous work:
- DNS answers may still be cached
- CSS, JavaScript, images, and fonts may be in the HTTP cache
- an existing network connection may be reused
- TLS session resumption may reduce handshake work
- HSTS may immediately enforce HTTPS
- a service worker may serve resources locally
This means the complete sequence is not repeated exactly for every navigation.
Caching is one reason a website may load quickly for you but slowly for a first-time visitor.
What if something goes wrong?
Different failures occur at different stages:
- DNS failure: the domain cannot be translated to an IP address
- Connection timeout: the destination cannot be reached
- TLS error: the certificate is invalid or the secure handshake fails
- HTTP 404: the requested resource does not exist
- HTTP 500: the server encountered an internal error
- Render problem: HTML arrived, but broken CSS or JavaScript prevents the page from working correctly
Understanding the stages helps developers identify where a problem actually lives instead of treating every failure as “the website is down.”
How to observe this in your own browser
Open your browser's Developer Tools and select the Network tab before loading a page.
You can inspect:
- request URLs
- HTTP methods and status codes
- request and response headers
- DNS, connection, and waiting time
- transferred and cached resource sizes
- the order in which resources load
- the negotiated HTTP protocol
Useful command-line tools include:
nslookup google.comThis asks DNS for information about the domain.
traceroute google.comOn Windows, use:
tracert google.comThis shows the network hops that respond along a route toward the destination.
curl -I https://google.comThis retrieves the response headers without downloading the full page body.
The exact output will vary by location, network, operating system, browser, and time.
What to remember
Typing google.com is not one operation. It is a chain of coordinated systems:
- The browser interprets the URL
- Caches and security policies are checked
- DNS translates the domain into an IP address
- Routers move packets toward the destination
- TCP or QUIC establishes communication
- TLS secures and authenticates the connection
- HTTP carries the request and response
- Server infrastructure processes the request
- The browser builds the DOM and CSSOM
- Layout, paint, and compositing produce the final pixels
The impressive part is not that these steps happen. It is that they usually happen so quickly that they feel like nothing happened at all.
The next time a page appears after one press of Enter, you will know that DNS, routing, encryption, servers, and the browser's rendering engine all worked together to place those pixels on your screen.
Tagged
Comments
Join the discussion. Your email is never shown publicly.